Using Images in Autocad
by Jeff Weber
(Vincennes, Indiana, USA)
Using Images in AutoCAD... Well now that you have an image attached what do you do with it?
Please visit attaching images in AutoCAD to see how I've done this already.
As I indicated on the page above, I typically use an attached image to help me create an electronic copy drawing out of a hard copy drawing.
To do this you would need to scan the hard copy and save it as a JPEG image (or your preferred image type; although JPEG's work great because of their small size) and then attach the file.
So if you followed the previous post above, then you already have a drawing with an image attached.
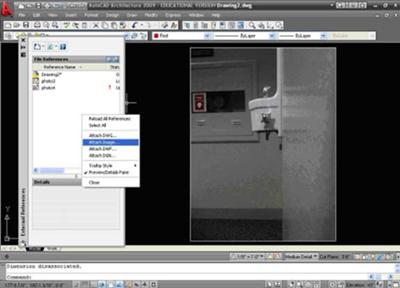
I have a drawing that I attached and an image of a water fountain that I want to convert to a CAD drawing.
There are a lot of times when I cannot get to a site to take measurements and this was one of those times.
Someone sent this to me and wanted me to draw it.
The only thing I needed was a set dimension.
Once I have the image attached, I use the information provided to me by the client.
For instance, I was told the distance from the front of the fountain to the wall was 5½”.
So, initiate the "Scale" command and select the bounding box around the image.
I then use a base point near the intersection of the wall and the fountain, and use the "Reference" option within the Scale command to get the correct scale.
Now that I have the image attached and scaled correctly, I can start to use the image to help me draw.
At this point I would basically start tracing the image.
This technique is the same as using a light table, which is still used today by some firms but has become less and less important.
Here are some commands and options that are very useful when working with images.
Display Order – Set your display order so that your image in “Sent to the Back”
This allows you to draw over the top of the image without the image blocking what you are drawing.
Fade – You can right click on the bounding box of the image and select properties.
Under the Image Adjust heading, there is a box labeled “Fade”.
Click in this box to display the “3 little periods” (Ellipses) and click on them.
Now you can use the slider bar to set the fade from 0 to 100 percent.
Using fade is very useful when tracing plans to convert them to drawings.
Imageframe – Once you have the image set the way you want it, type in IMAGEFRAME.
Set IMAGEFRAME to 0 and hit enter.
Your image is now “locked”.
In summary, I use images all the time and find them very useful... especially when I need a hard copy drawing converted into a CAD file.
Comments for Using Images in Autocad
|
||
|
||
|
Click here to add your own comments Join in and write your own page! It's easy to do. How? Simply click here to return to AutoCAD Tips. |
Sign up for our FREE CAD Tips and Tricks Newsletter:
"The CAD Times"
Join "The CAD Times" Newsletter Along With 5,000 Subscribers
Recent Articles
-
What is AutoCAD Used For?
Jan 27, 23 07:50 PM
If you ever wondered what is AutoCAD used for, read on... -
Viewport turns black
Oct 29, 21 09:34 AM
I was giving a dog file to work on, and when I try to insert a north arrow into layout viewport, the viewport turn black when I move my cursor into the -
Converting .pdf's to .dwgs
Oct 29, 21 09:31 AM
I get a LOT of plans from clients where they used some cad program that will only create .pdf files or they found a plan on a site and it came to them


